Thursday, 7 April 2016

Cod and carrots in French yuzu butter


I pan-fried some cod the other day for lunch, and here is the crazy part. When I was in France in 2009, I smuggled various butters back with me, maybe 5 different blocks. One was from a place in St. Malo, La Maison du Beurre (The House of Butter). They even had a small museum at the back, and various butter tools and accessories for purchase. They had flavoured butters, and I got one called yuzu. Yuzu is an Asian citrus type fruit, and goes amazingly with white fish. I always find lemony things go with white fish, where salmon type fish are yummy with orangey flavours. I tried to find yuzu here in various Asian markets and couldn't. Most of the people didn't know what I was talking about. I wanted to make my own yuzu butter. When my friend went to France in 2011, she brought me another block of this butter, and I used most of it, but I had a piece in the fridge for too long, and then instead of tossing it I put it in the freezer. It's been years (4-5), and I took it out the other day. It was a bit darker, the way butter gets when it gets old, but it wasn't rancid, and had no sign of mold. I tried it, and it tasted fine, so I used it for my cod. Lunch was amazing! So that's nuts, because when I had a block of Stirling butter in the freezer, and it didn't sit in the fridge for months but went in the freezer shortly after I bought it, when I took it out and put it in the fridge to thaw out, it didn't take long for it to grow mold inside of the block. It looked like blue cheese. Stirling, if you don't know, is from Stirling Creamery in Ontario (north of Belleville), and has won awards. It's supposed to be Canada's top butter. Canadian butter is s**t, not just because of this incident. Stirling is the first and only Canadian butter, as far as I know, to recently make butter with 84% fat. Most full fat butter here is 80-82%. When it comes to butter each % counts. It's why so many people complain about not being able to make great croissants here. The Polish butter I buy is minimum 84% fat, and that's the norm, standard across various brands. I keep it on the counter in a stoneware covered butter dish, and it does change colour around the edges, but I haven't had any go moldy yet, even after being in the freezer and thawing out, and then sitting on the counter. I often freeze butter when I buy extras. This is why I wish I had access to trusty raw milk, so that I could make my own cultured butter and cultured creme fraiche with a high fat content, as well as sour milk (similar to kefir) and so many other yummy fermented dairy products that most people here haven't even heard of and so get easily grossed out by. That is a sad part of human nature–not knowing something, being uncomfortable with it, and so shutting it down. Anyway, I though the butter surviving for so long was amazing. The butter didn't have mold or a rancid taste after years of sitting in the freezer. I still have a little piece big enough for one more fish fry  :) I should get some scallops.

The picture isn't the greatest, but it was a delicious lunch. The carrots I sauteed in plain Polish butter with cumin, black cumin (nigella, jeera, and various other names that it goes by), and tarragon. Tarragon and carrots are an amazing combination, especially when roasting carrots. I had these in a pot with a bit of water, so they wouldn't eventually burn, and the extra moisture creates a steam in the pot, so they soften faster, without being boiled. It's like roasting, but on the stove and in a pot. 

The fish I placed on a plate with paper towel in the fridge for a few hours changing the towel about 3x. I wanted some of the moisture to leave the fish, so that I could get a crispier outside without breading or frying. It's like drying a duck or goose for that crispy skin when it's baking, except my fish was skinless. Much of the formed crust was left in the pan, but I scraped it out because it was too good to discard. I sprinkled some salt and pepper on both sides of the fish filet, then sauteed it in yuzu butter. That's it. It's as yummy as it is simple.

If you try making the fish or the carrots leave a comment and let me know how it went. I imagine most of you won't have yuzu butter, but if you have access to yuzu fruit, just add it to the pan when you're sauteeing your fish. Another option is to use lemons, or even just plain butter, and then squeeze some lemon juice just before eating, otherwise the crispy coating will get soggy.

Enjoy!

Thursday, 18 June 2015

Strawberries, Wild Strawberries, Shortcake Variation, Pinot Grigio

Summer's here!

I dream of strawberry shortcake, even though cream (and milk) and I don't get along. Today I thought of an alternative to whipped cream/double cream/clotted cream. Vanilla Yogurt! The yogurt can be home-made or store-bought, but the thicker the better, and obviously quality makes a difference--the less ingredients in yogurt the better it is. If your yogurt is runny, that's fine, but the berries may slide off faster. To make a thicker yogurt just place the yogurt in a sieve lined with cheese cloth over a bowl, and let the liquid--whey--drain. Thick store-bought yogurts (like Greek style) are made thick in two ways: thickeners and straining. If you don't make your own yogurt and you don't want to pay more for Greek style, just buy regular yogurt and strain it (in the fridge). Buying plain yogurt and flavouring it yourself is best, because it won't have all the additives of sugar and flavours.

Anyway, using vanilla yogurt in place of cream is fantastic. Now I can eat even more strawberry shortcake!

These are strawberries and strawberry-wild strawberry mutants from my backyard. Last year my strawberries and my wild strawberries cross-pollinated, which messed up the wild strawberries. They are now a bit larger with a distinct texture and more of a strawberry taste. I wish it had gone the other way.


Vanilla and cardamom poundcake with vanilla and berries.


Wild strawberries floating in Pinot Grigio. They're even better with champagne.


Sliced strawberry on top of vanilla yogurt.


This is a photo from last year. You can see the thickness of the cream.

Enjoy!

Asparagus as a Meal

I made this dish--or something similar--about two years ago from an online recipe. I couldn't remember where the  recipe was from, and I'm not sure if I'm remembering it exactly. It turned out well nonetheless.


This is quite easy and quick to make, and even though it doesn't look like much, it's quite substantial.

1. Grate asparagus stems (I roasted the heads for another dish).
2. Briefly blanch (~15 seconds); you want the stems slightly softened, but still with a bit of a crunch. Drain, and quickly rinse in cold water.
3. Melt butter in a pan, add almonds, and fry until the butter has browned a bit, and the almonds look plump.
4. Place asparagus in a dish, and pour the butter and almonds over the asparagus.
5. Squeeze a bit of lemon, and serve.

This is best eaten right away, so make only as much as will be eaten.

Bon appétit!


Tuesday, 19 May 2015

Chicken and Waffles Updated

Update to the previous Chicken and Waffles

I've made the chicken and waffles again. Same waffle recipe as before, but I changed the herbs and spices in the bread crumb mixture. I also used maple syrup over the waffles. It was tasty, especially with the spicier breading. The herbs this time were: cayenne, paprika, salt, oregano, ground coriander, powdered onion, powdered garlic, marjoram, and thyme.

(I didn't bother taking more photos.)

Friday, 17 April 2015

Chicken and Waffles

Another first. I've never made or had chicken and waffles. I had 2 chicken breasts that I had to use up. I barely ever use my waffle maker, probably because when I lived with my parents my mom wanted banana waffles every weekend. I kept making them, but eventually stopped wanting to eat waffles--for a long time.


So here is my version of chicken and waffles. Again, I used what I already had in my kitchen.

Chicken

• chicken meat (I used 2 breasts, but used whatever parts you want)
• bread crumbs (regular, panko, or crush something non-sweet like corn flakes)
• butter for frying
• spices: oregano, thyme, salt, pepper, cayenne, Cajun mix--mix into bread crumbs
• egg, whisked for batter to stick

Slice the meat into thin strips, dunk in egg, then in bread crumbs. Fry in hot butter.


Waffles

I made up this recipe because I wanted something plain to go with the flavourful chicken, but feel free to add savoury flavours.

• 1 cup flour
• 1 cup milk (I didn't have milk, so I diluted 10% cream with water)
• 2 tsps baking powder
• salt
• 1 egg
• melted butter for batter

Melt butter. Mix flour, baking powder, and salt. Whisk egg into milk, and add to dry stuff, then add melted butter. Use hand mixer. Pour batter into waffle maker, 1/4 - 1/2 cup per waffle, depending on your machine. I don't measure, just eyeball it. Once you make a couple you'll know the amount that won't overflow or leave too many holes. This made 8 rectangular waffles. You can halve or double the recipe, or whatever amount you need.


Enjoy!

Friday, 10 April 2015

Ossobuco and Risotto

Here goes my bi-annual post. I'm really not very good at keeping up with this blog. Life gets in the way. I have a few hundred photos of food, and can't even remember all the ingredients for some of those dishes. Spring is in the air, but it's still cool and damp enough for comfort food.

Today I made ossobuco and wild mushroom risotto. This dinner was fairly inexpensive. I used ingredients that I already had. This was the first time I made ossobuco, though it wasn't the first time I've eaten it. I didn't use a recipe, because I wanted to use stuff I already had. The ossobuco I bought a few weeks ago, but didn't have a chance to make it then, so I froze it. For 9.40 CDN, it was enough for 2, and lots of marrow and gooey bits. Mmmm.


Here is what I used and did, but feel free to substitute anything. If you're familiar with my way of cooking, you'll notice that I eyeball amounts, and often don't make the same thing twice (because I like to use up what I have).

Ossobuco

• Melt butter in a pan or pot, something that has a lid and isn't too shallow.
• Take the veal and cover both sides in flour, then fry on both sides for about 10-15 minutes.
• Remove meat from pan, put it on a plate, then add sliced onions and garlic, simmer for a bit, add chopped celery, basil, tomato, lemon balm (or lemon peel or some other lemon herb). Stir, then add stock (I used turkey, because I roasted a whole turkey last week, so I saved the stock, used a bit for this, and froze the rest for future use).
• I also added a bit of white wine vinegar and a bit of red port. Ideally I would've used white wine, but I didn't have any. Veal works with reds and whites, so you can choose which you want, or mix.
• Place the veal in the pan, cover and simmer for 2-2.5 hours.
• This yummy sauce covers the veggies in this meal.


Risotto

• Melt some coconut oil or lard in a pot.
• Coat (dry) short grain rice in the fat. I used Arborio.
• Add 3x the liquid relative to the dry rice, but do it about 1/2 cup at a time. I used water, but you can use stock. Since the ossobuco is rich, I wanted the rice to be light, which is why I didn't add grated parmesan at the end.
• After the first or second portion of liquid, add spices. I used rosemary, tarragon, thyme, salt, pepper, celery seed, and dehydrated mushrooms. Keeping dry mushrooms in your pantry is awesome, they add so much flavour to all kinds of things, are inexpensive, and have a lengthy shelf life (just keep them in a dry place).
• Keep adding the liquid.
• Part way through I added a piece of Grana Padano rind (a cheese similar to parmesan, but milder), just because I had it and wanted to use it up. You can add grated cheese (parmesan or something like it) at the end to add flavour and creaminess, but like I said I wanted to keep it light. The mushrooms and herbs added lots of yummy flavour.


Easy and delicious!

Friday, 19 December 2014

Bruschetta

I'm awful when it comes to posting in here. Truth be told I'd rather spend time making food than blogging about it. I post more frequently in Yummy Recipes (general recipes) and in Metal Porkchop (ferments) on Facebook, because it's faster. However, today I'm sick and don't feel like doing much, so here I am. I can't believe the last post I made was in January. Geez!

By lunchtime I had enough energy to make a tasty meal. So if I can make it while I'm sick, anyone can make it whenever.


I used 4 heirloom tomatoes, a variety that I grew this summer and then froze. Home-grown sun-ripened tomatoes of any variety can't be beat in flavour. I realize that not everyone has access to such treats, so to make up for the loss of flavour, add a bit more spices and a pinch of sugar--the pinch size depends on the size of your batch. It's easier to add than to take out, so always taste before adding more.

Here are the steps:

Heat up butter, add chopped garlic--local is best and most flavourful. The amount depends on your taste buds. I used 4 cloves for my single serving, because I love garlic, plus it's an antibacterial, which I need right now.

Then add chopped onion. I used one small local onion.
I scored a 10 lb bag for 99¢ (compared to $3 for 2 heads of garlic). Small onions are great for use with daily meals, because you can use a whole one and not have to bother with storing the other half.
Side note: If you don't mind the onion smell, onions are a great way to clean the air: just leave a wedge on a plate.

Simmer for a few minutes, then add rosemary, oregano, thyme, and basil. Stir and add tomatoes. Simmer until they soften. After 15 min or so, if you have too much liquid, remove the lid and simmer  until most of it cooks off.

Slice a baguette, toast it if you like, and top each slice with the tomato mixture. You can stop there, or keep going. I added slices of lachsschinken and marscapone. The 4 pieces were my lunch, but if you're making these as appetizers, you can make smaller servings.


Just in time for the holidays! Enjoy! (I did, and I already feel better.)


Friday, 3 January 2014

Chestnut Butter

Chestnut butter is delicious, but impossible to find here, so I make my own. Even chestnut paste is difficult to find.  This chestnut butter recipe is very simple.  All I used were whole chestnuts (only available around Christmas time here), honey, seeds from a vanilla bean, a pinch of salt, and some water.

Cut x's into chestnuts and boil them for about half an hour. Rinse in cold water, peel. Use a food processor and add all ingredients, add enough water to get a spreadable consistency (see photo below). Put into a jar and refrigerate. Chestnut butter like pumpkin butter is dicey when it comes to canning, because they're both so thick, so don't bother, unless you have access to an industrial canner.


Meyer Lemons

Meyer lemons are delicious, and here in Canada they're only available for a short time around Christmas. Each year I buy a bunch and preserve them in various ways. They're sweeter than lemons, their skin is more delicate, and they are very fragrant.

Here are some of my preserves:

Meyer lemon marmalade, which can be used on scones, bread, cakes, cupcakes, mixed into yogurt or ice cream (vanilla or sweet cream), or on its own; it's awesome.


Three ingredients: lemons, sugar, water. That little pouch of cheesecloth contains the lemon seeds, which provide all the pectin you'll need for this tasty treat. Canning time 5 minutes.


Candied Meyer lemon slices:
lemon slices, water, sugar, cook down until all the liquid is gone. You can lay out the slices on a plate/cookie sheet/ parchment paper to dry. I don't bother, just put the slices in a jam bowl with a lid.

Meyer lemon sugar:

Grated Meyer lemon skin and cane sugar. You can do this with salt (and some herbs) as well and use as a rub for fish and chicken, in salads, wherever you want a savoury lemon flavour.

Meyer lemon chutney:


Meyer lemon slices with maple smoked sea salt, shallots, and truffle oil. I kept these in the fridge for a whole year. Very strong, so a little goes a long way. Had both chutneys with various white fish at Christmas. You don't need to wait that long, just give it a week or two for the flavours to mingle. By the end of the 12 months all the oil had been absorbed into the lemons. The flavour was very intense and salty. 


Meyer lemon slices with crushed juniper berries, chilli flakes, maple smoked sea salt and oil.


Another thing I do is wash, dry, and freeze whole Meyer lemons (I do this with regular lemons as well). Then instead of squeezing lemon into my morning water, I grate the whole thing, so I get juice, pulp, and skin.  You can also dehydrate slices and use in tea or water, or dehydrate skins (peel off before squeezing out juice which you can freeze in ice cube trays and add to water) and then crush/crumble into salads, soups, tea. Another way to preserve is to slice the lemon and layer it in a jar with sugar (I use raw cane sugar) and store in the fridge, then when I feel like lemon tea I just add a slice to my cup. Just don't waste any part of these yummies.


Friday, 5 July 2013

Quinoa Salad with Apple Cider Vinegar

Quinoa is a super versatile food, it's also tasty, healthy, and an ancient grain, meaning it hasn't been tampered with the way some other grains have been.  Two years ago I planted some quinoa seeds in my backyard, but as soon as they sprouted, the bunnies cleared all the sprouts.  I'd like to plant quinoa again, because it has amazing flowers and because I like using it in various ways.

This is a very simple quinoa salad.  It can be adjusted by using various ingredients.  What makes it yummy is the basic salad dressing, which is oil and apple cider vinegar.

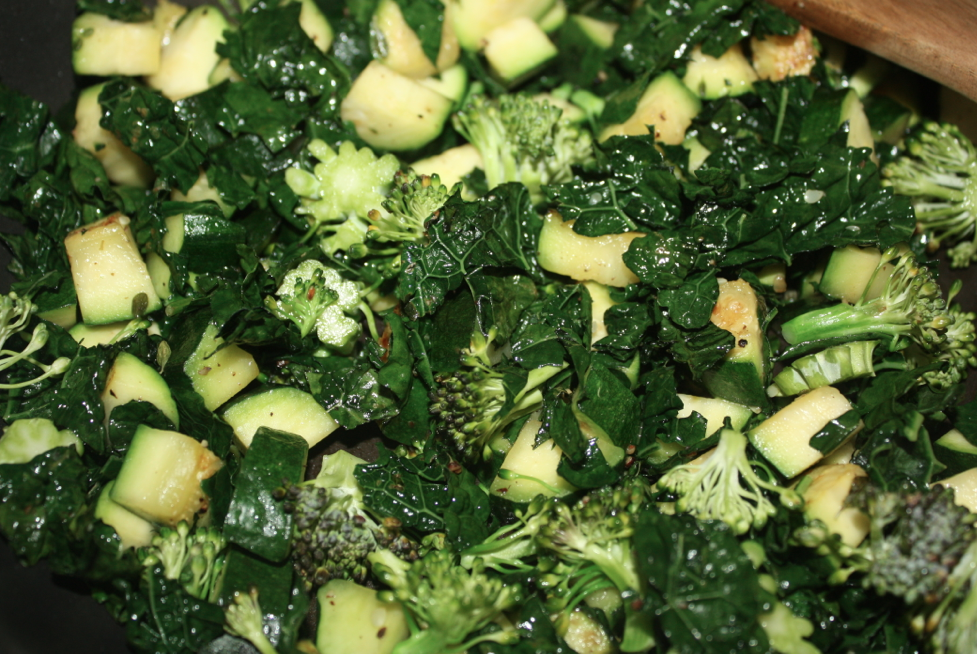
To start, cook some quinoa, I usually use one cup, and it makes enough for three meals.  While the quinoa is cooking, heat some butter in a pan.  Wash and cut up a zucchini, and add to the butter.  Wash the kale, tear the leaves into pieces, discard the hard stems, and add to the pan.  Cut up a head of broccoli and add it to the mix.


Cut up a tomato.  I like plum tomatoes for stuff like this, because they aren't as juicy/seedy.


Once the quinoa is done, put it in a bowl, add the veg, season with salt and pepper, mix it all up.  Pour a bit of apple cider vinegar and olive oil or grape seed oil over top, mix it in.  Cut up some feta, and sprinkle over top.  One of the grocery stores I go to sells Macedonian feta, which I prefer to the various Greek fetas.  It's creamier and not as salty, almost like something between goat's cheese and Greek feta.


I've made this salad with peppers, onions, spinach, mushrooms, olives, sunflower seeds.  You can use whatever you have on hand.  A lot of the recipes I come up with are based on ingredients I have or need to use up.  This salad is yummy warm or cold, and perfect for lunches and picnics.


Light Summer Breakfast


Warm weather usually makes me crave lighter foods.  I love cottage cheese, sweet or savoury; it makes a perfect first or second breakfast.  Here it's just cottage cheese with raw local honey, wild blueberries, and a slice of whole rye bread (the dark moist kind made with whole grains of rye).  This particular whole rye bread is made with hazelnuts and seeds, and is called muesli.  Sometimes I get sunflower, but  the plain one is my favourite.

Cauliflower Pasta


This pasta is so easy and quick to make, it's delicious, and inexpensive even when cauliflowers are pricy.

All you'll need is
-a cauliflower, cut into florets
-butter
-garlic
-egg noodles (or pasta of your choice); if you've been reading my blog, you'll know I love egg noodles
-about 250 ml of heavy cream
-chili peppers, crushed (adjust amount to your taste buds)
-fresh or dry thyme
-1tbsp of breadcrumbs
-s&p

Cook the cauliflower in a pot of salted water for about 10 minutes, you don't want it to be overcooked.  Drain or remove with a slotted spoon, but save the water.  In a pan melt the butter and add garlic for a few minutes.  Depending on your taste buds and the garlic you're using, you may need one clove or a few cloves.  Add bread crumbs, chili, thyme and cauliflower to the pan.  Add about 5 tbsps of the reserved water, stir, and simmer.  After about 10 minutes, take the pan off the heat, beat in the egg and add the cream.  You can cook the pasta in the remaining cauliflower water.  You always want pasta to be al dente, as in not cooked all the way through, because it absorbs the sauce once mixed, and continues to get softer.  Drain pasta, put in a dish, pour the sauce over, and enjoy.

Another variation is to cook the cauliflower as above.  Melt the butter and add garlic.  Then add the cauliflower to the pan.  Cook you pasta in the cauliflower water.  Once done, drain and pour the pasta into the pan with the cauliflower.  Season with s&p, put on plates, and top with Parmesan.

Thursday, 4 July 2013

Grilled Cheese +

Greetings Y'All!

It has been far too long.  I have over 400 photos of foods I've made since my last post over six months ago.  I've been so busy and tired, that even though I took loads of pics, I didn't have the time to write and post stuff.  I'm still busy with school and various other courses, plus gardening--I finally have a proper veg garden, not just a patch any more--and just day-to-day stuff.

Anyway, I should be doing homework, but I decided that today is the day I get back to this blog.  Maybe it was this amazing sandwich I made for a late lunch.

Here it is, so easy, quick, filling, and delicious.  And you know I don't make unhealthy stuff.


Cut up some onion--I used half for this one sandwich--and sauté in butter with s&p, and maple syrup.  You want enough maple syrup to make sure all the onion bits are in it.  


Let it all simmer until it gets thick, like a jam.  BTW, you could use this as a condiment on all kinds of stuff.


In another pan make your grilled cheese sandwich.  I used 2 small buttered sourdough rye slices with old cheddar.  Once it's done, put it on a plate and use the same pan to fry an egg.  


Top the ready grilled cheese sandwich with the onion jam, add a slice of ham or bacon, or sausage (which is what I used), or some other tasty pork meat, and add the egg.  


You could just leave it with the onions, but I had a late lunch, so I was hungry.  I'm not hungry any more, but if I had another one of these sandwiches in front of me, I'd eat it.  The maple syrup with the onions was amazing, and its sweetness was yummy enough that I didn't crave dessert.  If you know me, you know that I always want dessert.  Pair this gem with a tasty beer and you're good to take on the world.  I had a glass of Hacker-Pschorr (German).

Cheers!

Sunday, 2 December 2012

Peach Custard Cream Pie


I want pie all the time.  When it comes to deciding on flavour, custard wins most of the time.  I've made peach pie before using various recipes, but this one I made up, because I had cream and frozen peaches I needed to use up.  I made a graham crumb crust, which is even quicker, and less messy, than a buttery crust.

Here it goes:
Preheat oven to 350.
Make graham crust according to box directions, usually about 1.25 C crumbs to 1/2 C melted butter.
Don't pre-bake.
Defrost and drain peaches, or use fresh ones, then fill the crust.


Mix a bit of flour, 2-3 tbsps, with 2/3 cup sugar, then add 1 cup cream and 1 egg.  Whisk.
Pour mixture over peaches:


Bake for 45 minutes.


I didn't completely drain my thawed out peaches, so the bit of liquid made the custard creamy.  It was delicious, just not as firm as it would have been without any liquid.  Creamy custard is perfect with peaches.
Enjoy!


Friday, 16 November 2012

Pickled Pumpkin


My other gran (not the one I always mention) used to pickle pumpkin.  I don't know her recipe, but I made up my own.  I didn't measure, just eyeballed amounts.  Here is what I used:

- large Cinderella pumpkin (Rouge Vif d’Etampes)


I used the one on the left for pickling, the one on the right to make pumpkin butter.


- apple cider vinegar
- white vinegar (for a few jars, just so I can compare the taste)

There were a lot of pumpkin cubes, so I made the brine in 3 batches, and for one of them I used white vinegar, which isn't as acidic as apple cider vinegar, so don't use as much water with it.

- filtered water
- sugar
- bay leaf
- cloves
- black peppercorns

Directions:
- peel and cube the pumpkin, be ready for some serious exfoliation of your skin
- bring to boil all ingredients, except pumpkin, and boil for a few minutes
- place the cubed pumpkin into the boiling mixture and boil for about 5 minutes, don't over do it, or the pumpkin will cook and start to fall apart
- place into hot clean jars and can as you would any food in a jar, boiling for 10 minutes.

I tasted the brine and it was yummy.  I hope this turns out as good as I remember it, it's been over two decades since I've last tasted my gran's pickled pumpkin.

Apple Custard Pie with Oatmeal Walnut Crumb Topping


I've never cared much for apple pie, regardless of quality and price range.  I had some apples and cream that needed to be used up, and a frozen dough disk, from when I made a couple of extras.  After contemplating, I decided to make an apple pie based on what I had in my pantry.  I did make an apple pie once before and didn't like it.  I love this pie.  Apple pie wasn't the problem, I just never had this apple pie.  Here's what you'll need:

Filling Ingredients:
- 3-4 peeled and thinly sliced apples (I used Gala, because it's what I had)
- 1/2 cup of 35% cream
- 1 egg
- 3 tbsp demerara rum (or bourbon)
- 2/3 cup brown sugar
- 1 tsp cinnamon

Topping Ingredients:
- 5 walnuts (it's all I had)
- 1/3 cup not instant oatmeal
- 1/4 cup cold butter
- 1/3 cups flour
- 1/2 tsp cinnamon
- pinch of salt

Directions:
Set oven to 375 degrees

- Whisk together: cream, rum, egg, sugar, and cinnamon
- Add sliced apples, the thinner the more surface for coating, and mix together
- Pour into unbaked crust

For Crumb Topping:
- Place walnuts, oatmeal, flour, cinnamon, and salt in a food processor, and pulse just to mix
- Cut in butter, and pulse until the mixture resembles coarse bread crumbs
- Sprinkle on top of filling

Bake pie at 375 for an hour.  Tastes delicious hot or at room temperature.  It would work cold as well.  I had two and a half slices already, and I'm debating if I should have another.

This is a trick I use when I roll out the pie crust dough.  Place the dough disk between 2 sheets of parchment paper, that way there is no sticking and mess on the counter.  This is great especially in small working spaces, like my kitchen.  Once you have the right size, peel off one side, and flip into the pie plate, press gently into the plate, and then peel off the remaining paper.


Use a fork to create a few vent holes:


Thinly sliced peeled apples:


Apples stirred into the custard mixture:


Pour the mixture into the unbaked crust:


Sprinkle with walnut oatmeal crumbs:


Bake at 375 for an hour, et voila:


Tastiest apple pie my taste buds have ever experienced:


 I am super pleased with this recipe.  Enjoy!